Monday, June 17, 2013

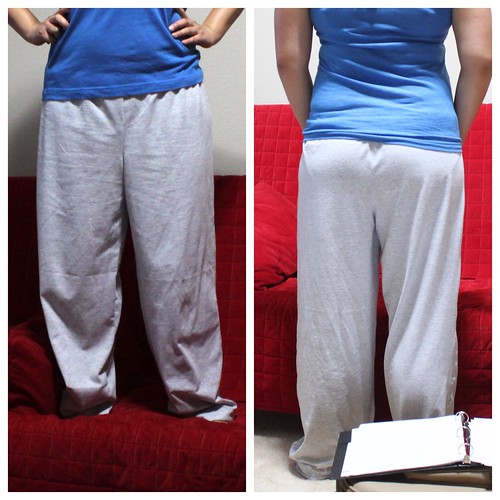
MADE: Simplicity 9499 PJ Bottoms - UFO Bust

On a little bit of a posting spree, and the projects are in no particular order...

I don't even remember cutting out the fabric, but found the cutout fabric sitting in my workroom closet... at the latest I think it's been 2 years. For awhile, I hadn't sewn anything for my husband so I think it was going to be a project for him... that's probably why it became an UFO...j/k! ;) Since the UFO Busting initiative, I decided I should go ahead and finish it for him. Luckily, fabric.com keeps your order history so I was able to look it up, and this fabric is from 2006!  In a sense... it's stashbusting and UFO busting!

Simplicity 9499
Sorry... too lazy to move the binder and retake.

Pattern: Simplicity 9499 (not found on Simplicity.com)
Fabric: gray jersey knit from fabric.com in 2006 (my 2nd order with them)
Cost: $7 = $4 (fabric at ~$2/yd) + $1 (pattern) + $2 (notions)
What I Love: Easy peasy pattern

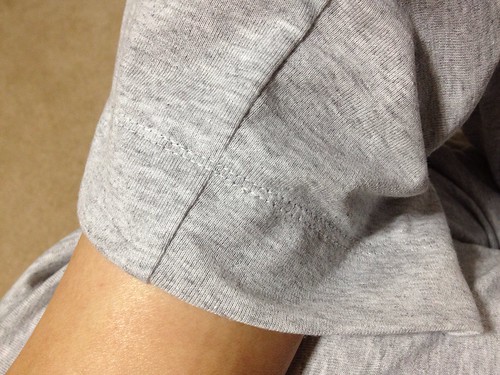
I don't remember too many of the details but I believe it's just 2 pattern pieces since that's what I found, the front and the back. I didn't bother to take out the instructions this time around, but did need to pick up elastic at the store. I sewed the side seams first then the inseams, turned one leg out and put it inside the other leg (right sides together) matching up the "u" seam and stitched. After that, I added the elastic at the waist and did a 1 1/2" deep hem with double stitching. I also stitched the elastic down on the side seams so it doesn't get twisted after washing and wear.

Simplicity 9499

I put them on for the pictures and am now wearing them as I write this post... they're super comfy! I may have to keep them for myself..... or just make another pair with pockets for ME! Just a warning, I don't remember what size I cut out but it's pretty wide even for Mr. So's and my big thighs, which I think makes it perfect for lounging around in. :)

MADE: Colette Sorbetto 1.0

On to the details on my Sorbetto from this epiphany post...

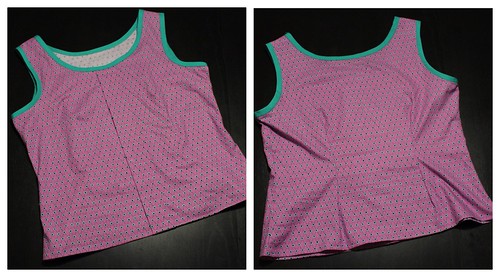
Colette Sorbetto v1.0

Pattern: Colette Sorbetto - available free here
Fabric: quilting cotton from SWAP and turquoise cotton from Joann for binding
Cost: ~$3.25 = $1.75 (turquoise cotton) + $1.50 (turquoise thread)
What I Love: the turquoise binding!
Notes:
  • Added 0.75" back darts
  • Took in about total 1" at the side seams in the waist
  • Need to shorten the bust dart by at least 0.5"
  • Need to lengthen at least an 1"

Colette Sorbetto v1.0

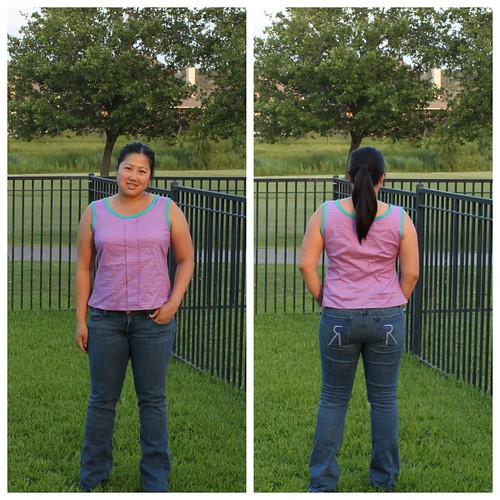
Overall the top turned out ok, but I'm not loving it. The fabric is definitely all wrong for this pattern. It's way too stiff and just flares out at the bottom. I like how the back fits with the darts, but from the side it's not attractive. It also just reminds me of PJs, which could just be because of the print. I did wear it out one day, but I'm not sure if I'll wear it out again... it may just be my at home shirt. Who knows if there'll be another one... there are too many other things I want to make before I make another version.

Colette Sorbetto v1.0
Sorry for all the wrinkles! 

NOTED: UFO BUSTING

UFO = UnFinished Object

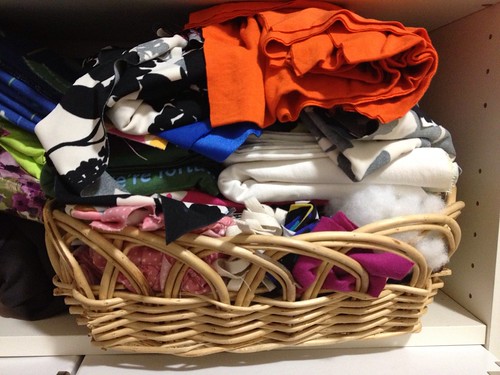
At what point does a project go from "in-progress" to "unfinished object"? I have this basket of items that are in various stages, which I consider to be UFO's.

UFO Pile

This is how I would define it... for me projects become UFO's when they are neglected for awhile and I've just lost the drive to finish it. On the other hand, I also have some in-progress projects that are taking me a little longer to complete just because other more urgent projects come up (i.e. Mother's Day gifts, etc.). These projects to me would not be considered UFO's; however, the likelihood of these eventually becoming UFO's are high.

Miss Lulu announced that she was going to bust her UFO stash and has already posted her first bust here! I'm going to join her in her UFO Busting mission. I also have lots of items that need mending (i.e. hemming, attached buttons, etc.) so in addition to busting my UFO stash I'm going to bust my MEND pile.

I, Angela, have a UFO stash and a MEND pile. I pledge to bust at least one UFO a month and mend three garment each month for at least the next 3 months.

As I write this I've already busted my stash and pile for June! :)

Sunday, June 9, 2013

MADE: Simplicity 1873 Dress 1.0

Wanted to make a dress for a particular wedding... there's nothing like creating under pressure. The dress was completed in time... back in April! As you can tell, I have a little bit of a backlog in posting makes... and they're getting posted in no particular order.

I've had my eye on this pattern for quite some time now. I love planning makes, and I always have at least 10 things in queue which are often changing because I get so distracted. Often, I'm not as good as executing the plan as planning it. However, I knew I wanted to make this pattern right away and knew which fabric to use. The fabric is from a fabric sale at a place I learned how to sew from February 2008 but is no longer there. Overall, it came together pretty easily and have one more in the works, but not for myself. :)

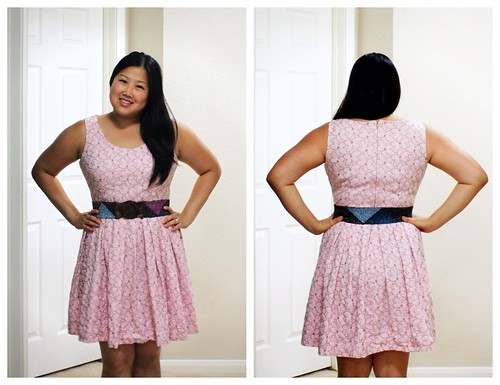
Simplicity 1873 v1.0

Pattern: Simplicity 1873 View C
Fabric: embroidered pink twill from stash and nude rayon lining from a local shop, The Common Thread
Cost: not sure... the fabric is too old :P
Love: Simple yet classic design
Notes:
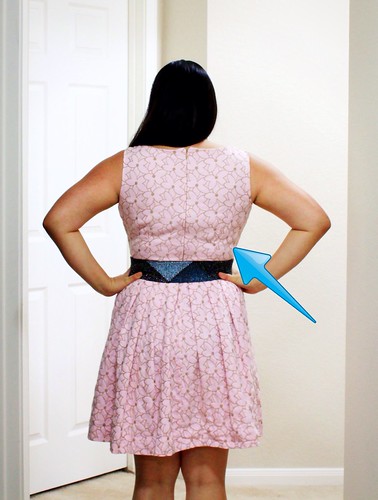
  • I was going to add the tab with view C, but I simply forgot about them. However, I'm glad I did because now I can wear this fabulous belt with it! The belt is from a couple of a years ago from Anthropologie.
  • Basted the pleats on the skirt, but they still didn't line up properly with the bodice.  Luckily, it's not noticeable!
  • Needs pockets.
  • After taking the pictures, I noticed that back was a smidge long. There is this bulge I didn't notice until I saw the pictures.

Simplicity 1873 v1.0

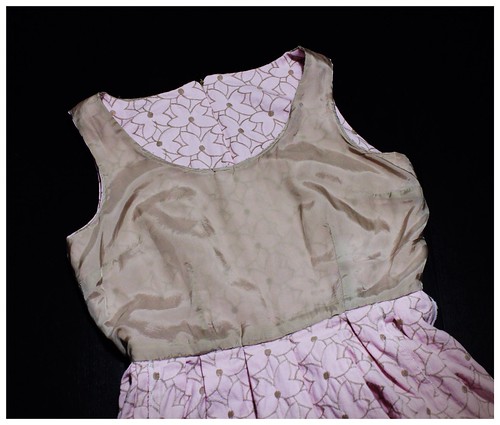
The invisible zipper was pretty dang good except the very top. I sewed the plastic zipper stop right above the seam allowance so when the lining was flipped over the plastic piece kept it from being a clean zipper application. I'm not sure why I did that... oh well, I just need to remember not to do that. It's not "perfect" at the bodice and skirt... I think it's due to the bulk. I know I know... now I'm just being nit picky! :P

Simplicity 1873 v1.0

Machine blind-stitched hem... please excuse the wrinkly-ness.

Simplicity 1873 v1.0

Lining slip-stitched to waist:

Simplicity 1873 v1.0

Love this dress and have already worn it several times. :)

Friday, June 7, 2013

MADE: Sun Hats Galore: Burda 05-2009-141

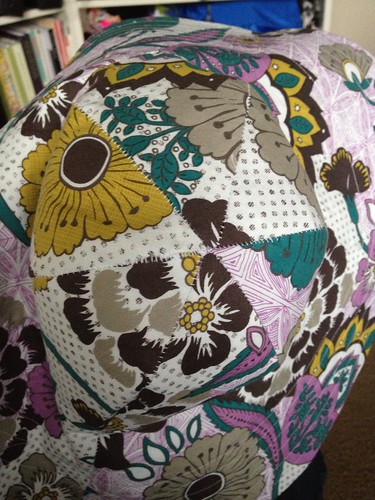
For Mother's Day gift, I decided to make sun hats for my mom, mother-in-law, and grandmothers. I originally was going to use Amy Butler's Blue Sky Hat pattern, but did not have it in my stash. One day I was browsing through my Burda magazine archive and noticed this pattern 05-2009-141... it was perfect!

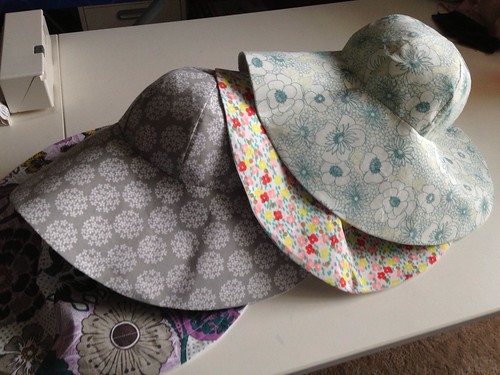
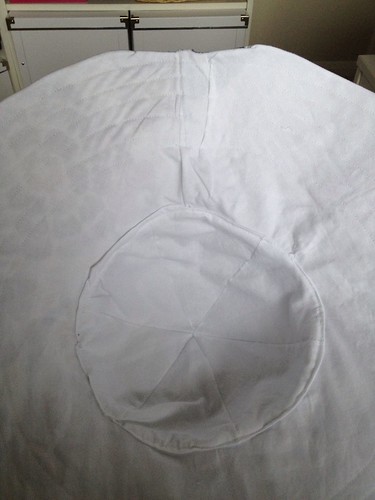
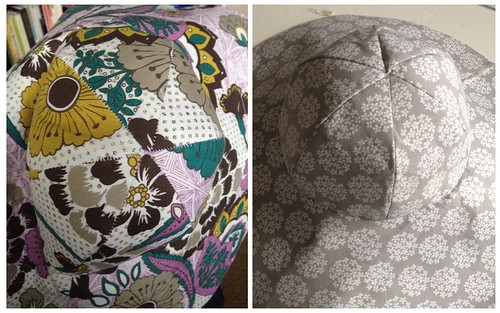
I ended up making five because my first one was an utter failure (more on this later), and I have one more cut out for myself. It might be awhile before I finish mine because I need a break after the first 5.  The 5th hat is not picture, but it's the same fabric as the bottom hat.

Sun Hats!!!

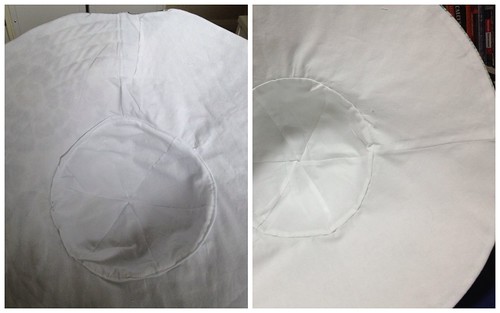
Searched to see if anyone had made it and turns out there were some already made up. Reviews can be found here on Pattern Review. One of the reviews said she just used a serger to make most of the hat. I thought that sounded pretty good and that it would make the process quick so wanted to give it a try. Big mistake for me! I could not get the tension correct even after several attempts. The stitching on the crown could be seen in the right side, and I didn't have enough control to line up the crown pieces easily.

Sun Hats!!!


Also, I realized I cannot serge in the round very well, which resulted in the brim being partially eaten up. :(

Sun Hats!!!

I just didn't have enough control/experience with my serger to actually use as a main method of construction. After that mess, I decided to mostly machine stitching and some hand stitching. I ended up having to buy more fabric because I didn't have enough of the first one to make a second hat, which my mom consequently chose to be her fabric. The results are much better!

Sun Hats!!!
Sun Hats!!!

Pattern:  Burda 05-2009-141
Fabric:  various quilting cottons from Joann
Notions:  fusible woven interfacing
Cost:  no idea... various costs for each of the quilting cotton pieces.
What I loved:  2 pattern pieces!
Notes:  With careful layout, 1 yard of exterior and 1 yard of lining can make two hats.

The Burda directions were ok, but their finished hat's crown seams didn't line up. I pretty much followed Melissa's steps listed in her review here. My detailed steps are listed here for reference.
  1. Trace pattern the two pattern pieces (crown and brim) twice.
  2. Add 1/4" seam allowance to one set of pattern pieces.
  3. Use the pieces with seam allowance to cut out exterior (6 crown pieces and 1 brim) and lining pieces (6 crown pieces and 1 brim).
  4. Use the pattern pieces without seam allowances to cut the fusible interfacing.
  5. Fuse interfacing to exterior pieces.
  6. Stitch exterior crown pieces in pairs.  Press seams.
  7. Stitch two of the pairs together, and then carefully stitch the 3rd pair to the other two while carefully matching the seams.  Press seams.
  8. Repeat for the crown lining.
  9. Stitch the single brim seam for both the exterior and lining.  Press seams.
  10. With right sides together, stitch the exterior and lining brim pieces together at the outer brim.
  11. Flip right sides out and press seams.
  12. Pin exterior crown to both layers of the brim with right sides facing each other and stitch.
  13. Press seam allowance for the crown lining.
  14. Drop crown lining into hat with wrong sides of the crown exterior and lining facing each other.
  15. Pin in place and slip stitch crown lining to brim lining.
  16. Press all seams.
  17. Optional: Topstitch a few rows on the brim beginning at the outer edge.
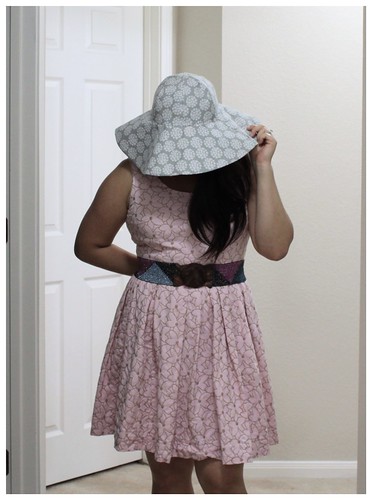

Sun Hat
More on the dress coming soon~!
Thursday, May 30, 2013

NOTED: Exposed Bias Binding Epiphany

So maybe it's just me, but I didn't realize until just the other day how to easily sew an exposed bias binding. I wish I could say that I came up with it but it was in the instructions for the Colette Sorbetto pattern!

I always thought that you sew the right side of the bias tape to the right side of the fabric. Then fold over the bias and topstitch on the right side while magically catching the backside. Pre-made bias tape is sold where one side is wider just so that it will catch on the backside. However, especially on curved edges it doesn't always catch or I would fold over more of it just to be extra sure that there would be lots of extra tape on the wrong side, which to me was equally as bad and ugly. In other cases I would topstitch with the wrong side up which would not always look pretty on the right side. I would get so frustrated with this... Sometimes I would unpick the stitches and then redo or if it was minor I would just live with it. I wish I had some examples to you of each of these... I may have to go back and look for them.

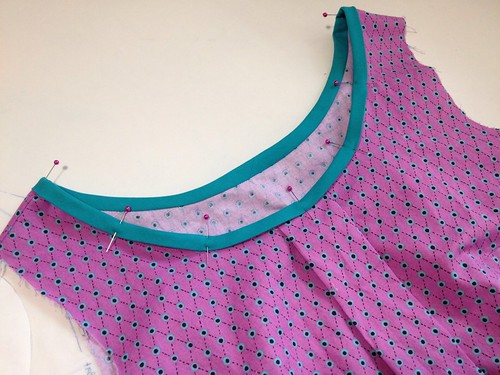
Well, in the Sorbetto instructions you sew the right side of the bias tape to the wrong side of the fabric. Then you fold it over to the right side and topstitch on the right side. This way you will make sure the bias tape is sewed down properly and neatly. Here is the neckline of my Sorbetto with the bias tape folded over to the front.

Bias Epiphany

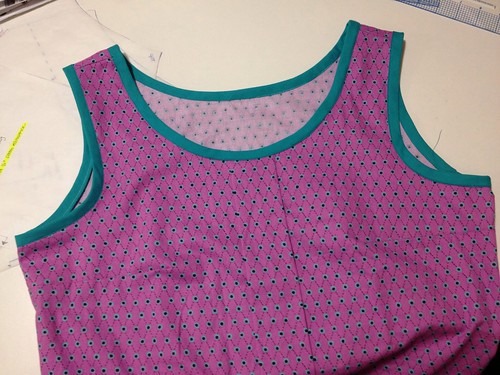
Tada! The bias tape is fully stitched down. The wrong side didn't always catch, but that's ok because it was sewed down when it was first attached. There are no places where the tape isn't fully sewn to the garment.

Bias Epiphany

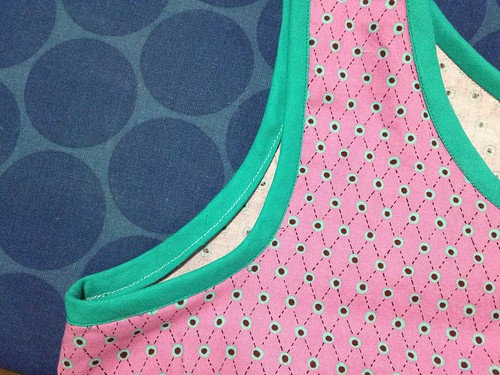
As a creature of habit, I of course went back to the old method on the first armhole. Just to show you an example, I went back to the old method for one of the armholes. The bias tape is fully caught in the stitching because I was sewing carefully and also folded the bias tape over more than I should just to be sure. You can see the extra bias tape below the stitching line on the wrong side.

Bias Epiphany

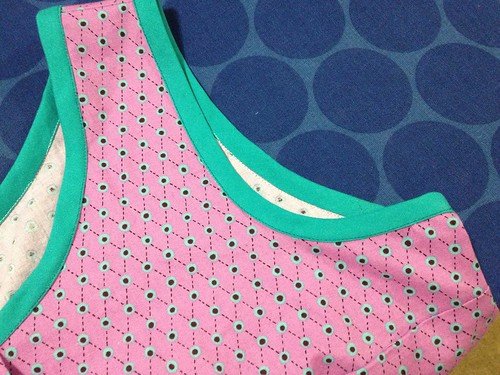
The second armhole was done the Colette method. Bias Epiphany

The left armhole (old method) has a slightly smaller width of the bias tape visible on the right side compared to the neckline and right armhole. It's more noticeable in person than the picture.

Bias Epiphany

I'm so excited about this and hope that I will remember to use it in the future! Yay!

Tuesday, April 30, 2013

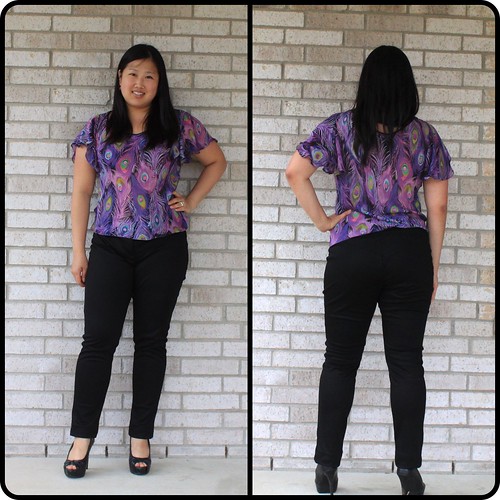
MADE: Burda 07-2013-130 Knit Skinny Pants

I've been wanting skinny pants for some time now. I have/had a couple of ready-to-wear jeans, but they just don't fit me well. I have to find something that will fit my hips and thighs, which usually means the waist is too big. I do have two pairs of Clovers that I wear sometimes, but they are not the best fit. Enter knit pants that look like normal skinny pants!

Burda 07-2012-130

Pattern:  Burda 07-2012-130
Fabric:  Ponteroma Knit from Hancock Fabrics in Black
Cost:  $18.18 (fabric 2 yds at $9.09/yd) + magazine
Size:  42 with adjustments
What I Love:  I love that this trouser pattern is for knit, but it's not an elastic waistband! I also love the back yoke and the center back seam on the waistband, which made it much easier to make waist adjustments.
Notes:
  • 1" seam allowances to help with fitting
    • took out 1" on the front pattern piece
    • had to go back after wearing and take in additional 1.5" at center back
  • 1st fly front zipper application, and it was much easier than I thought except for a couple of snaffus on my part.  I used this video tutorial by Susan Khaljie.
    • Remember to place zipper right side down. It's not mentioned in the video... it might've been self-explanatory, but when it's your first time it's hard to keep track. I made it with right side up, so I had to take it all out after I had already completed the fly front.
    • In this particular video, the fly opens to the right instead of the left like most pants/jeans. I didn't really notice this until way later and wasn't willing to re-do yet again. 
    • On a side note, we went to Half Price Books and found Power Sewing Step-by-Step by Sandra Betzina.  She has a very similar fly front method but also includes the facing. I'll probably reference this book more than video since it's easier to look at each step via picture rahter than pausing the video to work and then going back to push play. Also, Sandra's method has the fly opening to the left. ;)
  • Finished the bottom of the waistband with bias binding just to make it look nicer and more fun!
  • Wanted low rise (measured front and back of some pants to get the correct length) and made adjustments to the pattern.
  • Used hook and eye instead of a button at 1/2" away from the end of the extended waistband... so it's doesn't lay as flat as I would like.  I will probably add a snap at the corner.
  • Little bit of fabric pooling at the back thigh will need to adjust for this.
  • Need to add pockets!
  • Did not do the turn up hem, but did a 2" machine blindstitch hem.
  • Used blindstitch foot to help me stitch in the ditch at the waistband... it was difficult for it to go over the thicker side seams but worked pretty well has a guide.

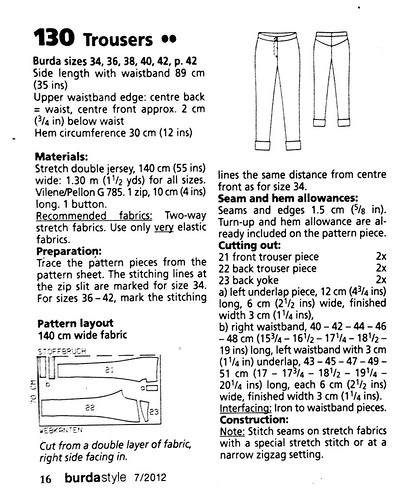
Here's the line drawing which show the back yoke details:
Burda 07-2012-130

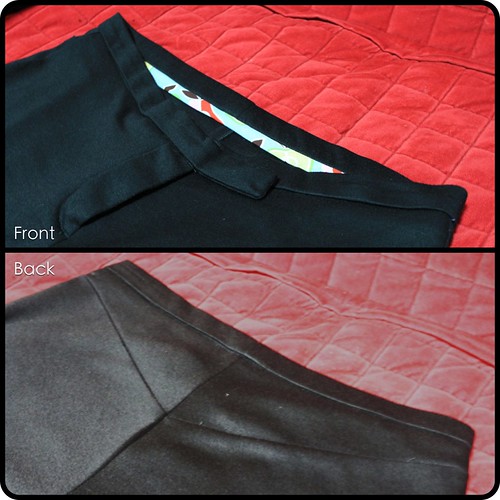
Here some of the line details on the actual pants:
Burda 07-2012-130

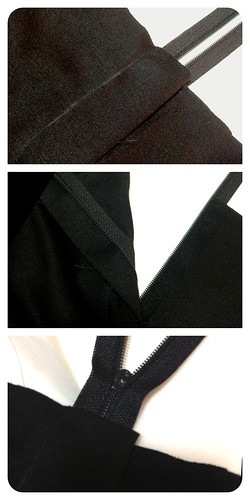
My first fly application... I was so proud until the last picture... the zipper is on backwards!
First Fly Front


Fitting pants is definitely not easy! Like I said, I have two pairs of Clovers that do not fit correctly to show for it. I'm not a muslin-ing type either... There are lots of online references on fitting; however, they didn't seem to help me with my particular issues. There are a couple of books I want to look into but haven't made any purchases yet. These fit relatively well. The front fits pretty well with no smiles or frowns other than the little bit of twisting near the knees. The back is actually not too bad except for the extra fabric along the back of the thigh. I need to do a little bit more research to fix that.

I DID have front and back pockets planned for this particular pair of pants.  I was going to put back pockets in the seam of the yoke and back pieces but I ended up putting the first one in backwards.  After that I didn't want to mess with them anymore... plus I would've had to add black facing in case the pockets gaped and showed the bright print. After basting all the seams to get the fit correct and working on these for so long, I didn't want to go back and cut the front pockets out either.  Haha... in the end these don't have pockets because I was just plain lazy, which makes me a little sad. How can you have pants without pockets?!  Oh well... I only have myself to blame.

I will make this pattern again. I already have the fabric pre-washed and ready to go! It's the same beautiful double knit that Susan used to make her beautiful skirt. I will definitely add pockets to this one!


Saturday, April 27, 2013

EATS: Thit Kho - Vietnamese Braised Pork Belly and Eggs

My day job is banking analyst at Whole Foods Market so naturally we talk a lot about food at work. :) One of my co-workers that I am pretty close with is Vietnamese. She, Kim, helps me recreate some wonderful traditional Vietnamese dishes. One of them being thit kho, which is a caramelized braised pork belly and eggs. This adapted from The Ravenous Couple, which can be found here.  Kim advised on a couple of changes and those are included below:

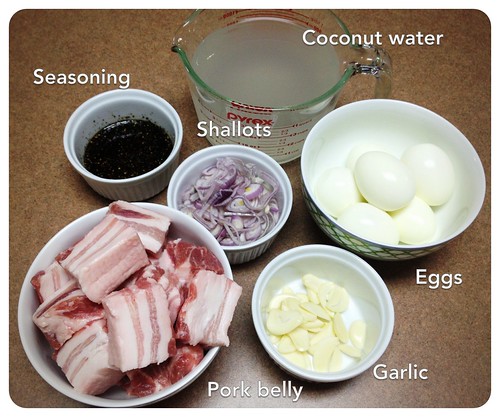
The ingredients:
Thit Kho

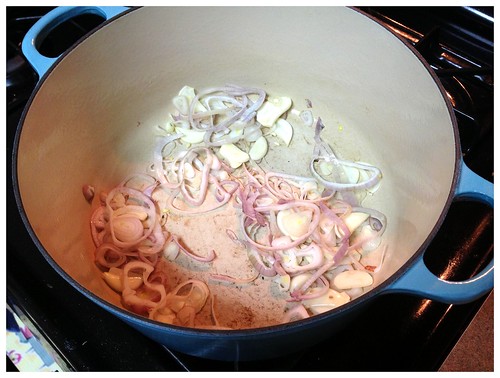
Saute the garlic and shallots: Thit Kho

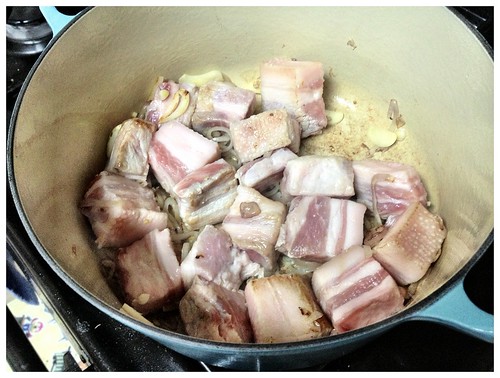
Add the pork belly:
Thit Kho 

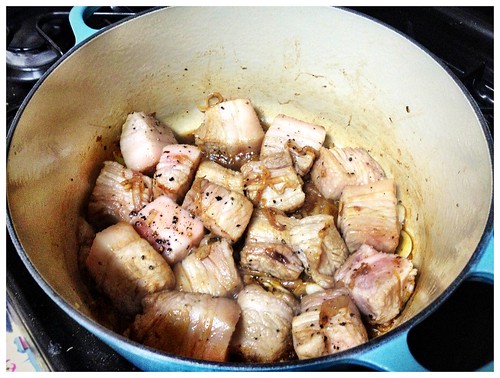
Add seasoning:
Thit Kho 

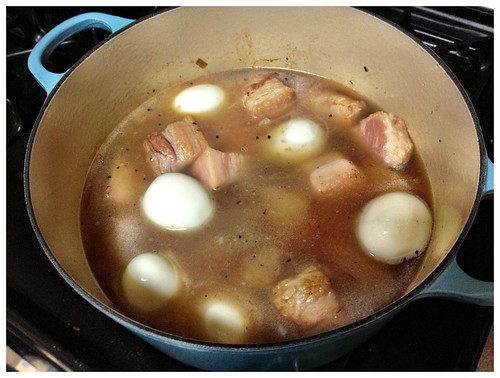
Add the hardboiled eggs and coconut water:
Thit Kho 

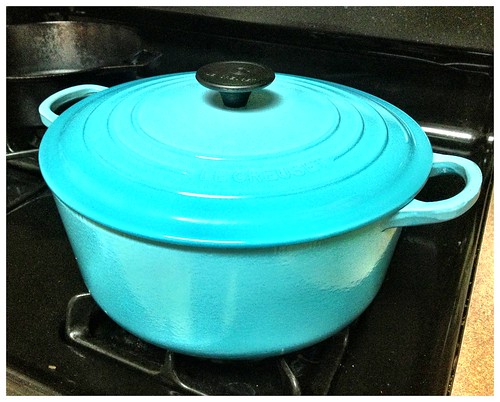
Cover and braise for 2 hours:
Thit Kho

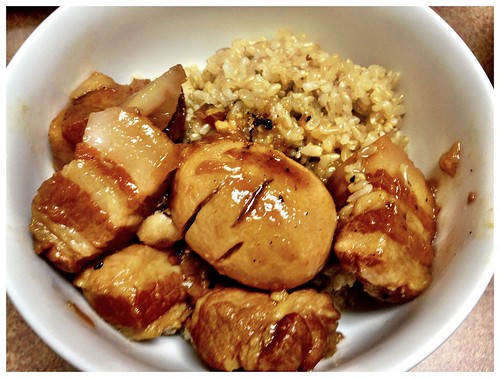
Add to a bowl for rice and enjoy!
Thit Kho

Ingredients:
2 lbs. pork belly
2 shallots
4 garlic cloves
4c coconut water
3 tbsp. fish sauce
1 tbsp. agave nectar
1 tbsp. pepper
1/2 tbsp. salt
4 eggs

Serves 4

Directions:
  1. Hard boil the eggs. (I did 6 instead of 4 because we love eggs!)
  2. Thinly slice shallots and garlic.
  3. Slice pork belly into 1"x2" pieces.
  4. Mix together fish sauce, agave nectar, pepper, and salt.
  5. Saute shallots and garlic in dutch oven.
  6. Add pork belly and sear meat.
  7. Stir in seasoning and saute for a minute or two.
  8. Add coconut water and eggs.
  9. Cover and braise for 2 hours stirring occassionally. 
  10. Eat with rice and veggies.

Wednesday, April 17, 2013

NAILS: Electric Pink

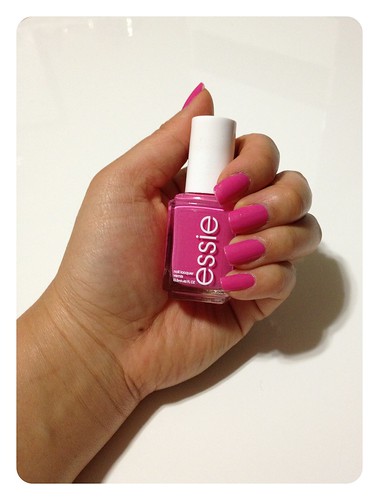
I did my nails!! My sister in law picked the color out for me. At first I thought it made my nails look too fake but it has definitely grown on me!

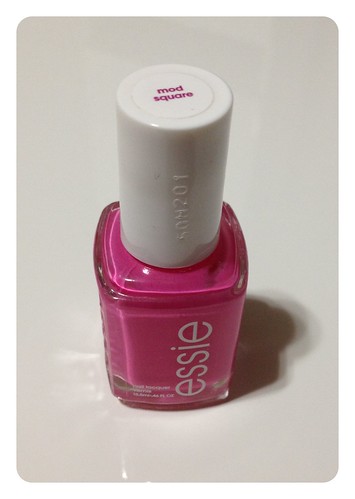
Essie Mod Square

Most of the time when I do my nails, the color chips or comes off right away because I'm pretty rough with my hands. This picture is day 2 so not too bad! The nail polish is Mod Square by Essie. It's very PINK... very Barbie! Hehe... and I like! I don't usually do full color with bright colors and instead a colored French tip. I will probably do more full colored nails in the future.

Essie Mod Square

Friday, April 12, 2013

FAIL: Burda Blouse

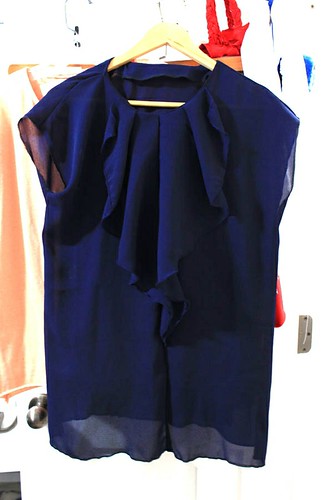
Most things I've made have mistakes all over them... imperfect stitching, un-matching thread color, etc. It's not that I don't like to have things perfect, but I would never wear anything if it had to be perfect.  And then I have the "Too many things gone wrong and I just don't like it!"  Here this particular specimen:

Poly Navy Burda 08-2009-117

From afar, it seems really innocent.  I know I could just go back and remedy all the minor things, but I'm just not feeling it for some reason.  One of these days, I'll go back and make this pattern again, but for this particular top... a wadder.

Pattern: Burda 08-2009-117
Fabric:  Navy poly chiffon from a fabric swap so it was free!

There is nothing particularly wrong with this pattern (other than the difficult to decipher Burda instructions, but that's with all their magazine patterns).  Actually, I love this pattern and this particular issue is one of my favorites!  So what's the problem?  Well when I list them out, they're all really minor...
  • I wasn't paying attention (I had pretty much already given up on this top anyway...) and I attached the facing incorrectly in the front.  There's supposed to be a keyhole in the front, but stitched it all the way up.  My head barely fits through the neckline.
  • This was the first time I've tried a rolled hem on my serger.  I did practice and it's not too bad but it doesn't help how I feel about this top.
  • There's a "tape stain" on the front.
  • The facing keeps flipping out even though it's understitched.

Monday, April 8, 2013

MADE: Peacock Taffy Blouse

A tale of fabric and pattern...

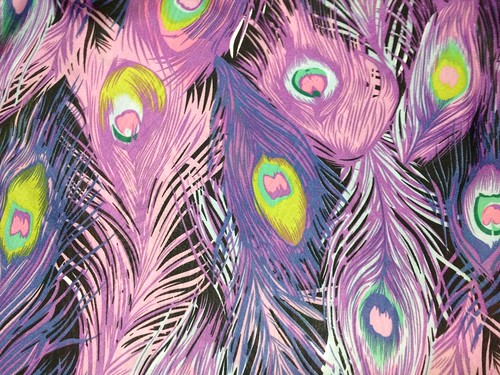
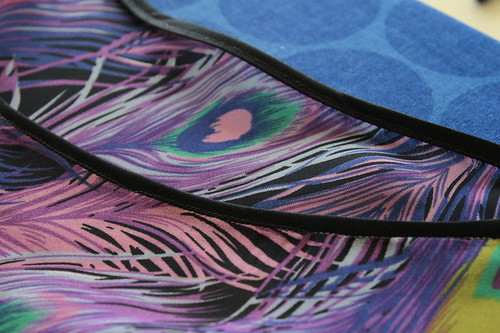
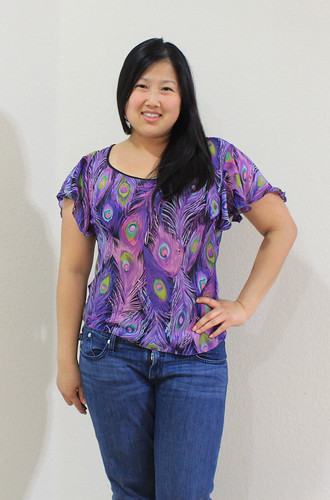
I fell in love with this fabric as soon as I saw it in the "silky" aisle of Joann. I originally bought it with the intent to make another Scout, but as I looked at the fabric it just called for something with a little bit more girly-ness to it and it sat on the shelf with the rest of the prewashed fabric waiting for the perfect match.  The peacock print is actually on the bias so, when I cut the pattern pieces on the bias it made the pattern vertical.

Poly Peacock Chiffon

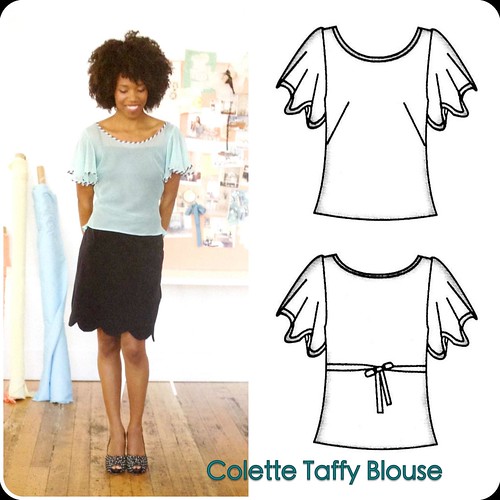
For Christmas I knew I wanted to get 2 sewing books... I was gifted with Gertie's and Colette's book. As I was glancing through the Colette book I noticed a particular simply blouse with just the perfect amount of frill. I knew this would be the perfect pattern for the long awaiting peacock chiffon.

Colette Taffy

Pattern: Taffy Blouse from The Colette Sewing Handbook
Fabric: Poly Chiffon with Peacock Print from Joann
Cost:  $18.58 = $3 (book $15/5 patterns) + $15.58 (fabric 2 yds @$7.79)
What I Love:  The fabulous fabric and only needing 3 pattern pieces!
Notes:
  • Stabilize/starch fabric MORE! 
  • Left off the ties because didn't see a need for them.
  • Chiffon hem for the sleeve instead of bias tape.

This was the first time I worked with fabric on the bias, and it was a beast to work with!  When using shifty fabric on the bias, be sure to use full pattern pieces.  I read several comments about this on the blogosphere, but didn't heed their warnings... BAD IDEA!  I couldn't get the fabric cut correctly on the fold or get the markings accurate, but it was close enough.  :)

peacock taffy 03

I was also super lazy and didn't switch out my thread when attaching the black bias tape on the neckline.  I have some trouble stitching in the ditch, too, and the lavender stitching definitely stuck out. (For some reason, the stitching on the this part was particularly wavy... not sure why.) I almost redid it, but someone at my local meetup suggested using black fabric marker to color in the thread.  What a genius idea!  Here's the below and after:

peacock taffy 01
peacock taffy 02
The black ink did fade a little after the wash, but it's definitely better than without it...

I do like the top, but in general I don't think I like clothing on the bias.  It's hard to describe... it just feels shifty like it's always moving around on you.  Haha... that just sounds weird, but it just feels funny when I wear it.  I will wear the top and will hopefully have some coordinating bottoms to wear with it soon.

peacock taffy 04

Tuesday, March 12, 2013

MADE: Cassette Tape Flannel Men's Shirt

The beginnings of a shirt for Mr. So...

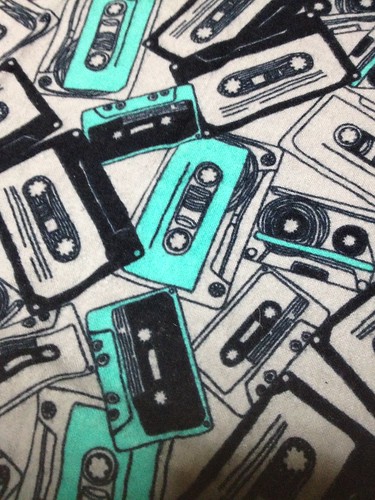
After making a scoodie for my husband with lining in a flannel covered with cassette tapes, I jokingly asked if he'd wear a button-up shirt with the same print. Surprisingly, he said yes. So off I went back to Joann to find this flannel... to my dismay it was no longer available. However, the nearest Joann is only 1 mile away so I stop there frequently just to browse and get other needed items. One day, I was walking through the aisles, and what do I find... the exact print again! It was no longer on sale for $2.79/yd at which I bought it for the scoodie; however, I still had a coupon was able to get it for $3.50/yd and so it began...

Cassette Tape Flannel

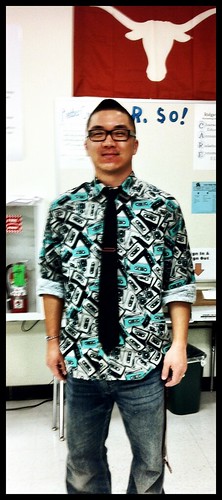
This particular version is his wearable muslin. He actually wore it to work the day after I finished sewing on the buttons for "Dress Like a Celebrity Day" (he's a teacher)... he was dressing like Russell Westbrook who apparently wears some crazy shirts and thick lens-less glasses.  (We are OKC Thunder fans and went to Texas hence the Longhorn in the picture!) Haha... it still had yellow pencil markings for the buttonholes and buttons but I'm sure no one will even notice with the loud print. What do you think... did he dress like Russell Westbrook?

Cassette Tape Flannel

On to the project details:

Pattern:  Kwik Sew 2777 (no longer on the website)
Size:  Medium (default 15 1/2" collar)
Fabric: 100% Cassette Tape cotton flannel from Joann
Cost:  $11.79 (pattern) + $10.50 (fabric 3 yd @ $3.50/yd)
What I Love:  That the pattern has a collar stand and the fabric is so much fun!
Notes:
  • Decreased sleeve length by 2"
  • All raw seams are enclosed except for sleeves and side seams
  • Sew carefully and make sure collar stand and cuffs incase all seams... my collar stand is a little off... which I need to go back and fix.
Future versions
  • Adjust collar size to be 16"
  • Flat fell side seams and sleeves (need to make seam allowance 5/8" instead of 1/4")
  • Research placket insertion techniques
  • If making a slim fit version, will need to add darts or some sort of shaping
  • Label the under collar so it doesn't get attached upside down
  • Try convertible cuffs
  • Reference Shirtmaking by David Page Coffin
Overall:
Instructions are pretty easy to follow along... just need to pay attention on the yoke attachment because the first few times I read it I was like "Wha???". Also, I noticed that the collar corners were flipping up and didn't know why. Miss Lulu, who is also mentioned on Susan's blog, noticed amongst the busy print that my undercollar was stitch as the top so note to self to label the under collar! This will be my go-to button-up (button-down?) shirt pattern for him.  I have fabric that has been in my stash that was bought with the intention of making him shirts, and I'm finally getting around to it.  Making these types of shirts take time and precision sewing so not sure when I'll get around to the next one. :P  Sorry, hon!

Sunday, March 10, 2013

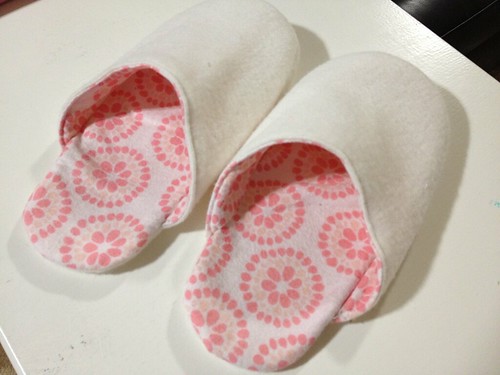
MADE: Candice House Slippers

Pattern:  Candice Slippers by iThinkSew
Fabric:  blizzard fleece leftovers for exterior and cotton flannel leftovers for interior; both from Joann
Size:  8
Cost:  $3.90 (pattern on sale) + $0.00 (scraps of fabric)
What I Love: Simple, easy pattern that does not require much fabric
Notes:
  • Made without adding seam allowances so sizing was not correct. Read the pattern and instructions because it clearly says it needs to be added... I just didn't read. 
  • Interfaced the lining, but not on the exterior and instead added another layer of fleece. It could use more stiffness and maybe more cushion as well.
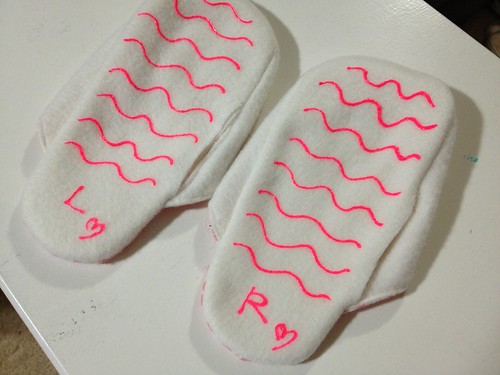
  • Used fabric paint on the bottom for anti-skid properties as well as marking right and left.
I have small feet (usually wear 6.5) and these barely fit me lengthwise... I need to be careful and read the pattern and instructions before proceeding.  I was just WAY TOO overconfident and this is where it got me. :(  Many people request for slippers when they come over to our house, and I'm not sure why... Could it be because we keep it at 62 in the winter?  Hehe... well there will be more of these in the future and hopefully they will be the correct sizes.

Tops:
Candice House Slippers

Bottoms:
Candice House Slippers
Please ignore the unfinished areas... :)

MADE: Scoodies Galore

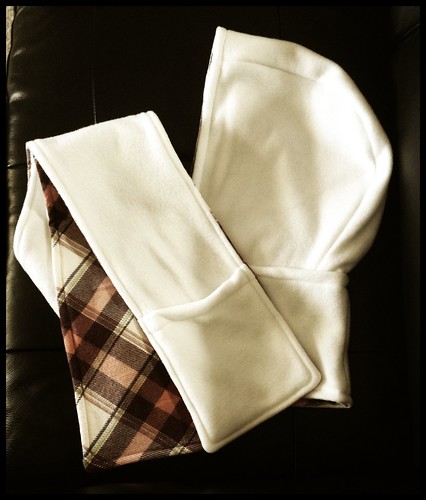
Long ago one of my brothers asked me if I could knit him a scarf, and then some time later he requested that this scarf have a hood.  I want to say this happened many many years ago. Well finally for this past Christmas, I made him this scarf with a hood known as a scoodie, except it wasn't knitted... I didn't get to take a picture of his particular scoodie, but here's one of out of the 6 that were made.

Scoodies!

Pattern: Scoodie (free pattern found here)
Fabric: Exterior - blizzard fleece (1.25 yds) from Joann; Interior - cotton flannel (1.5 yds) from Joann
Costs: $0.00 (free pattern) + ~$9.80(fleece $4.49/yd and flannel $2.79/yd or $3.99/yd)
What I Love: Super easy to make with 4 pattern pieces
Notes:
  • The middle piece of the hood did not match up with the sides of the hood at the notches. I just cut the middle and added 3/4". 
  • Added pockets to the ends of the scarf, which are just 8"x 10" rectangles in fleece. About an 1.25" of the top was folded over and then topstitched prior to attaching the the scarf.
  • Used 1/2" seam allowances instead of 5/8" for no particular reason except that I had blue painters tape marked for 1/2".
Overall:  This was a fun gift giving pattern.  I made these for our siblings plus one for myself and husband for a total of 6!  The long straight stitching on the scarf portion was a little boring especially after doing them so many times, but other than that it's easy peasy and the recipients loved them!  I may even make 2 more for friends that saw ours and loved them, too.

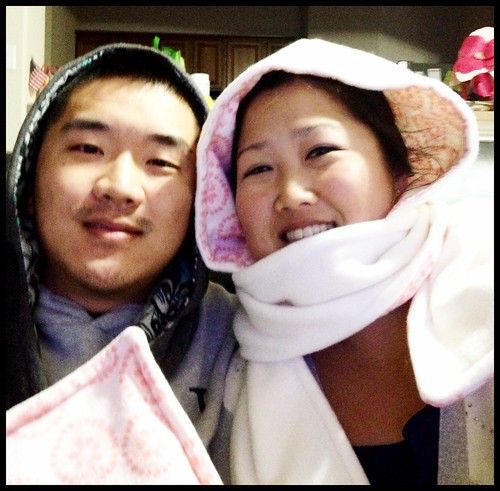
Mr. So and I are sporting ours inside our house... I think we may have worn them a total of 2 times since they were finished... maybe we need to go to Chicago to get more wear out of them. :)  There's also not a good way to wear the scarf.  If you try to wrap both of them around the neck the pockets are super close to your face.  I ended up just throwing one end to the back and keeping one end in the front. RTW scoodies have a detachable hood that can be placed at different intervals to help with this, but I didn't want to do the extra work.

Scoodies!

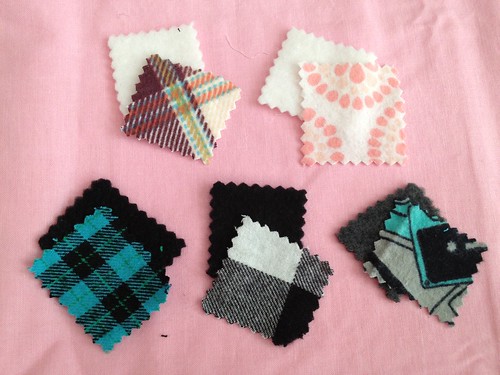
Coming up with the different fleece and flannel combinations for the different scoodies was pretty fun.  There are only 5 swatch combinations because one of them (black and white plaid flannel) was made twice. :)

Scoodie Swatches

In the end, my brother didn't even remember requesting this scarf, but nonetheless he was the inspiration behind making these!  :)

Friday, February 8, 2013

MADE: Scout Woven Tee

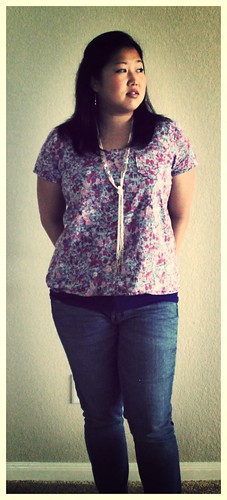
One of my fellow sewists at a local meetup is in love with this pattern (actually several of the sewists from the meetup have made this top and love it!) and so I decided to give it a try as well. It is a loose dartless woven top, which is not typically my first choice because I tend to lean towards more fitted clothes. I was a bit skeptical about it so I decided to use fabric I got at a fabric swap.

Untitled
Uploaded this to flickr using the flickr app with the mammoth filter.

Pattern: Scout Woven Tee by Grainline Studio
Size:  12
Fabric: floral print cotton lawn/voile from a fabric SWAP
Cost: $6.50 = $6.50 (pattern) + $0.00 (fabric)
What I LoVE:  Simple, easy pattern.
Notes:  Added tiny pointed pocket, which was traced from my Target Boyfriend Tee.

Overall:
I don't think that this is the most flattering top on me, and I'm not sure I made the best fabric choice.  However that being said, I wear this shirt A LOT... it's super comfortable.  It's been a few months since I finished this project and it's definitely grown on me.  (Thanks, Susan! :))  Overall,  I may make a few tweaks and try it again.

Potential modifications for next time:
  • Take it in a smidge in the back
  • Needs small FBA
  • Use drapier fabric