Monday, June 17, 2013

MADE: Simplicity 9499 PJ Bottoms - UFO Bust

On a little bit of a posting spree, and the projects are in no particular order...

I don't even remember cutting out the fabric, but found the cutout fabric sitting in my workroom closet... at the latest I think it's been 2 years. For awhile, I hadn't sewn anything for my husband so I think it was going to be a project for him... that's probably why it became an UFO...j/k! ;) Since the UFO Busting initiative, I decided I should go ahead and finish it for him. Luckily, fabric.com keeps your order history so I was able to look it up, and this fabric is from 2006!  In a sense... it's stashbusting and UFO busting!

Simplicity 9499
Sorry... too lazy to move the binder and retake.

Pattern: Simplicity 9499 (not found on Simplicity.com)
Fabric: gray jersey knit from fabric.com in 2006 (my 2nd order with them)
Cost: $7 = $4 (fabric at ~$2/yd) + $1 (pattern) + $2 (notions)
What I Love: Easy peasy pattern

I don't remember too many of the details but I believe it's just 2 pattern pieces since that's what I found, the front and the back. I didn't bother to take out the instructions this time around, but did need to pick up elastic at the store. I sewed the side seams first then the inseams, turned one leg out and put it inside the other leg (right sides together) matching up the "u" seam and stitched. After that, I added the elastic at the waist and did a 1 1/2" deep hem with double stitching. I also stitched the elastic down on the side seams so it doesn't get twisted after washing and wear.

Simplicity 9499

I put them on for the pictures and am now wearing them as I write this post... they're super comfy! I may have to keep them for myself..... or just make another pair with pockets for ME! Just a warning, I don't remember what size I cut out but it's pretty wide even for Mr. So's and my big thighs, which I think makes it perfect for lounging around in. :)

MADE: Colette Sorbetto 1.0

On to the details on my Sorbetto from this epiphany post...

Colette Sorbetto v1.0

Pattern: Colette Sorbetto - available free here
Fabric: quilting cotton from SWAP and turquoise cotton from Joann for binding
Cost: ~$3.25 = $1.75 (turquoise cotton) + $1.50 (turquoise thread)
What I Love: the turquoise binding!
Notes:
  • Added 0.75" back darts
  • Took in about total 1" at the side seams in the waist
  • Need to shorten the bust dart by at least 0.5"
  • Need to lengthen at least an 1"

Colette Sorbetto v1.0

Overall the top turned out ok, but I'm not loving it. The fabric is definitely all wrong for this pattern. It's way too stiff and just flares out at the bottom. I like how the back fits with the darts, but from the side it's not attractive. It also just reminds me of PJs, which could just be because of the print. I did wear it out one day, but I'm not sure if I'll wear it out again... it may just be my at home shirt. Who knows if there'll be another one... there are too many other things I want to make before I make another version.

Colette Sorbetto v1.0
Sorry for all the wrinkles! 

NOTED: UFO BUSTING

UFO = UnFinished Object

At what point does a project go from "in-progress" to "unfinished object"? I have this basket of items that are in various stages, which I consider to be UFO's.

UFO Pile

This is how I would define it... for me projects become UFO's when they are neglected for awhile and I've just lost the drive to finish it. On the other hand, I also have some in-progress projects that are taking me a little longer to complete just because other more urgent projects come up (i.e. Mother's Day gifts, etc.). These projects to me would not be considered UFO's; however, the likelihood of these eventually becoming UFO's are high.

Miss Lulu announced that she was going to bust her UFO stash and has already posted her first bust here! I'm going to join her in her UFO Busting mission. I also have lots of items that need mending (i.e. hemming, attached buttons, etc.) so in addition to busting my UFO stash I'm going to bust my MEND pile.

I, Angela, have a UFO stash and a MEND pile. I pledge to bust at least one UFO a month and mend three garment each month for at least the next 3 months.

As I write this I've already busted my stash and pile for June! :)

Sunday, June 9, 2013

MADE: Simplicity 1873 Dress 1.0

Wanted to make a dress for a particular wedding... there's nothing like creating under pressure. The dress was completed in time... back in April! As you can tell, I have a little bit of a backlog in posting makes... and they're getting posted in no particular order.

I've had my eye on this pattern for quite some time now. I love planning makes, and I always have at least 10 things in queue which are often changing because I get so distracted. Often, I'm not as good as executing the plan as planning it. However, I knew I wanted to make this pattern right away and knew which fabric to use. The fabric is from a fabric sale at a place I learned how to sew from February 2008 but is no longer there. Overall, it came together pretty easily and have one more in the works, but not for myself. :)

Simplicity 1873 v1.0

Pattern: Simplicity 1873 View C
Fabric: embroidered pink twill from stash and nude rayon lining from a local shop, The Common Thread
Cost: not sure... the fabric is too old :P
Love: Simple yet classic design
Notes:
  • I was going to add the tab with view C, but I simply forgot about them. However, I'm glad I did because now I can wear this fabulous belt with it! The belt is from a couple of a years ago from Anthropologie.
  • Basted the pleats on the skirt, but they still didn't line up properly with the bodice.  Luckily, it's not noticeable!
  • Needs pockets.
  • After taking the pictures, I noticed that back was a smidge long. There is this bulge I didn't notice until I saw the pictures.

Simplicity 1873 v1.0

The invisible zipper was pretty dang good except the very top. I sewed the plastic zipper stop right above the seam allowance so when the lining was flipped over the plastic piece kept it from being a clean zipper application. I'm not sure why I did that... oh well, I just need to remember not to do that. It's not "perfect" at the bodice and skirt... I think it's due to the bulk. I know I know... now I'm just being nit picky! :P

Simplicity 1873 v1.0

Machine blind-stitched hem... please excuse the wrinkly-ness.

Simplicity 1873 v1.0

Lining slip-stitched to waist:

Simplicity 1873 v1.0

Love this dress and have already worn it several times. :)

Friday, June 7, 2013

MADE: Sun Hats Galore: Burda 05-2009-141

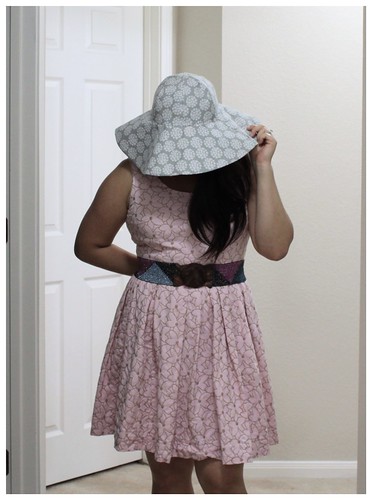
For Mother's Day gift, I decided to make sun hats for my mom, mother-in-law, and grandmothers. I originally was going to use Amy Butler's Blue Sky Hat pattern, but did not have it in my stash. One day I was browsing through my Burda magazine archive and noticed this pattern 05-2009-141... it was perfect!

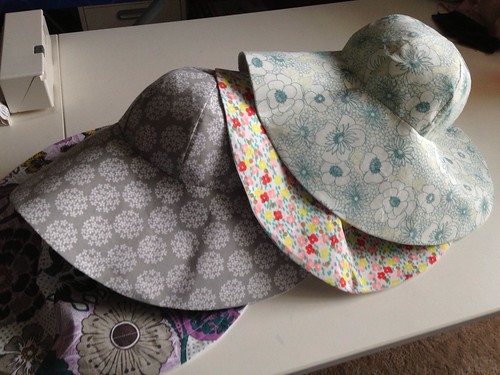
I ended up making five because my first one was an utter failure (more on this later), and I have one more cut out for myself. It might be awhile before I finish mine because I need a break after the first 5.  The 5th hat is not picture, but it's the same fabric as the bottom hat.

Sun Hats!!!

Searched to see if anyone had made it and turns out there were some already made up. Reviews can be found 
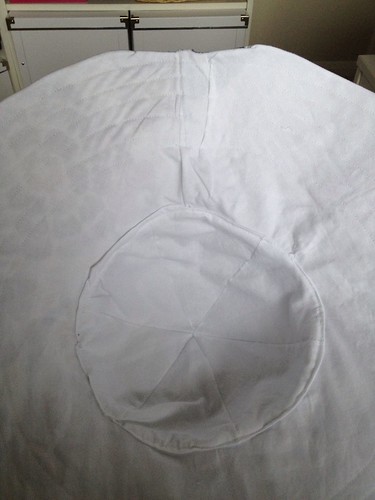
here on Pattern Review. One of the reviews said she just used a serger to make most of the hat. I thought that sounded pretty good and that it would make the process quick so wanted to give it a try. Big mistake for me! I could not get the tension correct even after several attempts. The stitching on the crown could be seen in the right side, and I didn't have enough control to line up the crown pieces easily.

Sun Hats!!!


Also, I realized I cannot serge in the round very well, which resulted in the brim being partially eaten up. :(

Sun Hats!!!

I just didn't have enough control/experience with my serger to actually use as a main method of construction. After that mess, I decided to mostly machine stitching and some hand stitching. I ended up having to buy more fabric because I didn't have enough of the first one to make a second hat, which my mom consequently chose to be her fabric. The results are much better!

Sun Hats!!!
Sun Hats!!!

Pattern:  Burda 05-2009-141
Fabric:  various quilting cottons from Joann
Notions:  fusible woven interfacing
Cost:  no idea... various costs for each of the quilting cotton pieces.
What I loved:  2 pattern pieces!
Notes:  With careful layout, 1 yard of exterior and 1 yard of lining can make two hats.

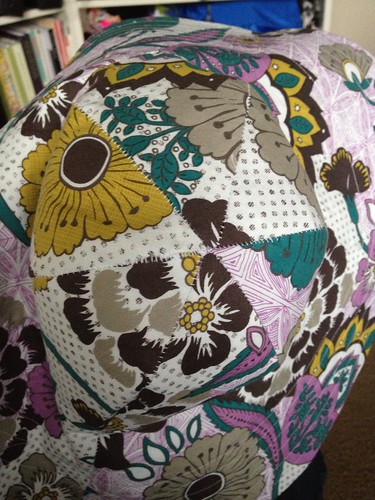
The Burda directions were ok, but their finished hat's crown seams didn't line up. I pretty much followed Melissa's steps listed in her review here. My detailed steps are listed here for reference.
  1. Trace pattern the two pattern pieces (crown and brim) twice.
  2. Add 1/4" seam allowance to one set of pattern pieces.
  3. Use the pieces with seam allowance to cut out exterior (6 crown pieces and 1 brim) and lining pieces (6 crown pieces and 1 brim).
  4. Use the pattern pieces without seam allowances to cut the fusible interfacing.
  5. Fuse interfacing to exterior pieces.
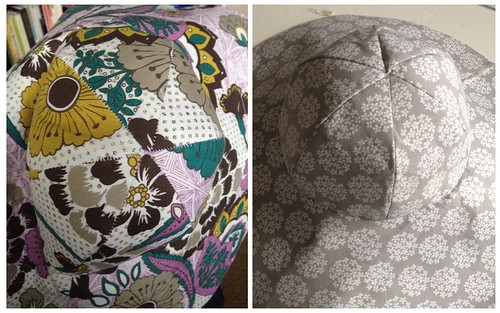
  6. Stitch exterior crown pieces in pairs.  Press seams.
  7. Stitch two of the pairs together, and then carefully stitch the 3rd pair to the other two while carefully matching the seams.  Press seams.
  8. Repeat for the crown lining.
  9. Stitch the single brim seam for both the exterior and lining.  Press seams.
  10. With right sides together, stitch the exterior and lining brim pieces together at the outer brim.
  11. Flip right sides out and press seams.
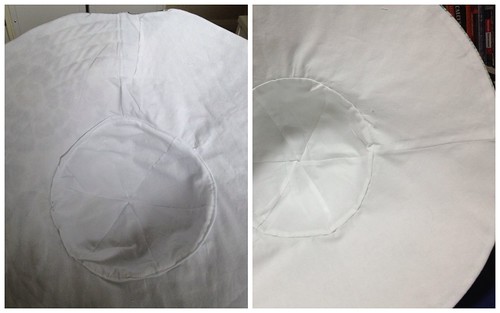
  12. Pin exterior crown to both layers of the brim with right sides facing each other and stitch.
  13. Press seam allowance for the crown lining.
  14. Drop crown lining into hat with wrong sides of the crown exterior and lining facing each other.
  15. Pin in place and slip stitch crown lining to brim lining.
  16. Press all seams.
  17. Optional: Topstitch a few rows on the brim beginning at the outer edge.


Sun Hat
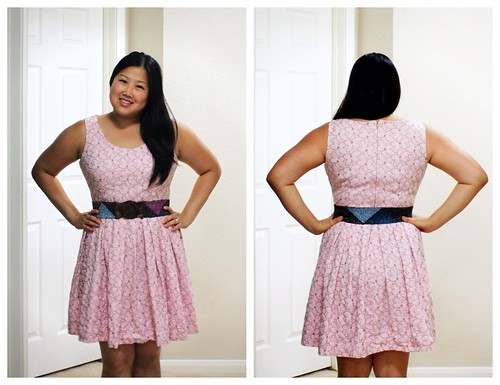
More on the dress coming soon~!