Tuesday, April 30, 2013

MADE: Burda 07-2013-130 Knit Skinny Pants

I've been wanting skinny pants for some time now. I have/had a couple of ready-to-wear jeans, but they just don't fit me well. I have to find something that will fit my hips and thighs, which usually means the waist is too big. I do have two pairs of Clovers that I wear sometimes, but they are not the best fit. Enter knit pants that look like normal skinny pants!

Burda 07-2012-130

Pattern:  Burda 07-2012-130
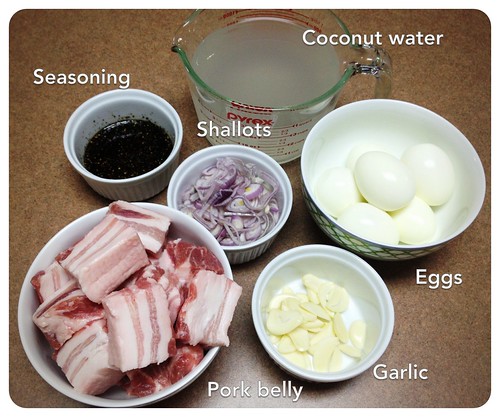
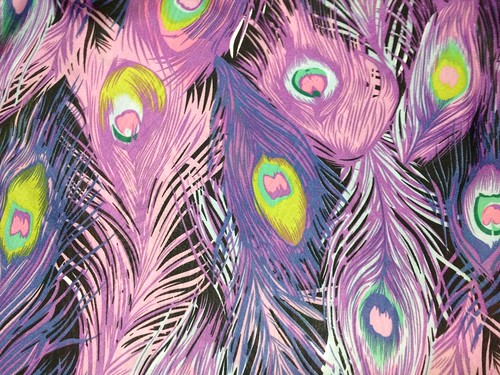
Fabric:  Ponteroma Knit from Hancock Fabrics in Black
Cost:  $18.18 (fabric 2 yds at $9.09/yd) + magazine
Size:  42 with adjustments
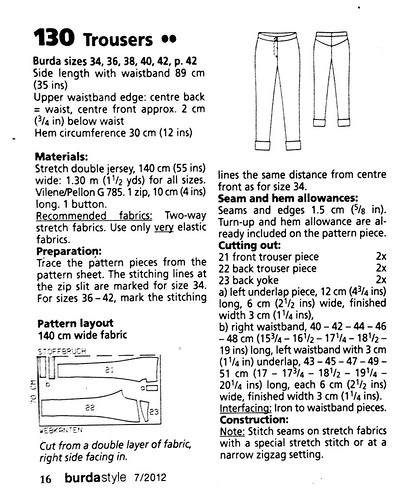
What I Love:  I love that this trouser pattern is for knit, but it's not an elastic waistband! I also love the back yoke and the center back seam on the waistband, which made it much easier to make waist adjustments.
Notes:
  • 1" seam allowances to help with fitting
    • took out 1" on the front pattern piece
    • had to go back after wearing and take in additional 1.5" at center back
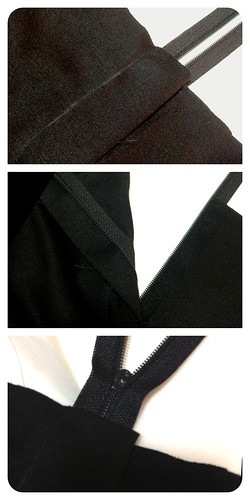
  • 1st fly front zipper application, and it was much easier than I thought except for a couple of snaffus on my part.  I used this video tutorial by Susan Khaljie.
    • Remember to place zipper right side down. It's not mentioned in the video... it might've been self-explanatory, but when it's your first time it's hard to keep track. I made it with right side up, so I had to take it all out after I had already completed the fly front.
    • In this particular video, the fly opens to the right instead of the left like most pants/jeans. I didn't really notice this until way later and wasn't willing to re-do yet again. 
    • On a side note, we went to Half Price Books and found Power Sewing Step-by-Step by Sandra Betzina.  She has a very similar fly front method but also includes the facing. I'll probably reference this book more than video since it's easier to look at each step via picture rahter than pausing the video to work and then going back to push play. Also, Sandra's method has the fly opening to the left. ;)
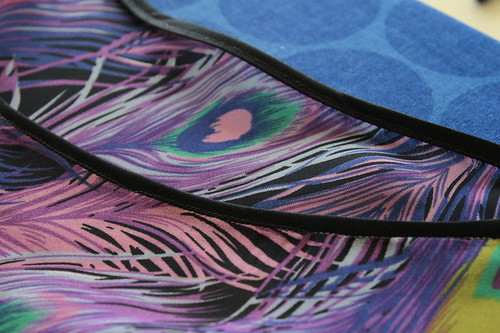
  • Finished the bottom of the waistband with bias binding just to make it look nicer and more fun!
  • Wanted low rise (measured front and back of some pants to get the correct length) and made adjustments to the pattern.
  • Used hook and eye instead of a button at 1/2" away from the end of the extended waistband... so it's doesn't lay as flat as I would like.  I will probably add a snap at the corner.
  • Little bit of fabric pooling at the back thigh will need to adjust for this.
  • Need to add pockets!
  • Did not do the turn up hem, but did a 2" machine blindstitch hem.
  • Used blindstitch foot to help me stitch in the ditch at the waistband... it was difficult for it to go over the thicker side seams but worked pretty well has a guide.

Here's the line drawing which show the back yoke details:
Burda 07-2012-130

Here some of the line details on the actual pants:
Burda 07-2012-130

My first fly application... I was so proud until the last picture... the zipper is on backwards!
First Fly Front


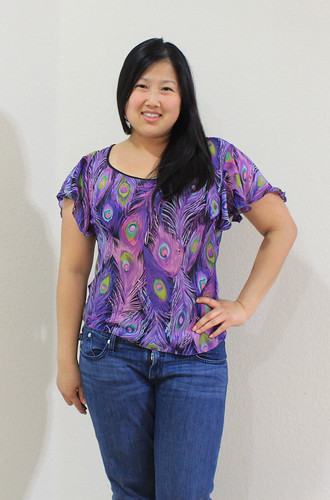
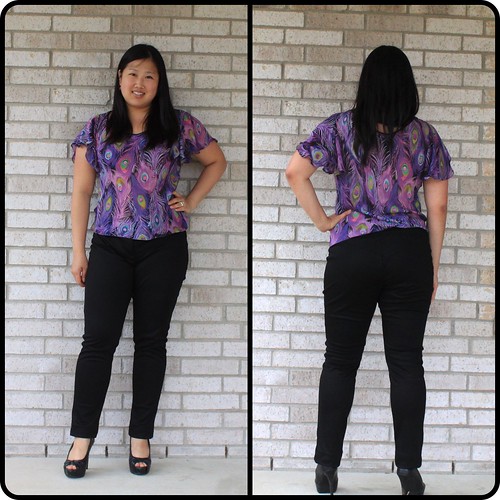
Fitting pants is definitely not easy! Like I said, I have two pairs of Clovers that do not fit correctly to show for it. I'm not a muslin-ing type either... There are lots of online references on fitting; however, they didn't seem to help me with my particular issues. There are a couple of books I want to look into but haven't made any purchases yet. These fit relatively well. The front fits pretty well with no smiles or frowns other than the little bit of twisting near the knees. The back is actually not too bad except for the extra fabric along the back of the thigh. I need to do a little bit more research to fix that.

I DID have front and back pockets planned for this particular pair of pants.  I was going to put back pockets in the seam of the yoke and back pieces but I ended up putting the first one in backwards.  After that I didn't want to mess with them anymore... plus I would've had to add black facing in case the pockets gaped and showed the bright print. After basting all the seams to get the fit correct and working on these for so long, I didn't want to go back and cut the front pockets out either.  Haha... in the end these don't have pockets because I was just plain lazy, which makes me a little sad. How can you have pants without pockets?!  Oh well... I only have myself to blame.

I will make this pattern again. I already have the fabric pre-washed and ready to go! It's the same beautiful double knit that Susan used to make her beautiful skirt. I will definitely add pockets to this one!


Saturday, April 27, 2013

EATS: Thit Kho - Vietnamese Braised Pork Belly and Eggs

My day job is banking analyst at Whole Foods Market so naturally we talk a lot about food at work. :) One of my co-workers that I am pretty close with is Vietnamese. She, Kim, helps me recreate some wonderful traditional Vietnamese dishes. One of them being thit kho, which is a caramelized braised pork belly and eggs. This adapted from The Ravenous Couple, which can be found here.  Kim advised on a couple of changes and those are included below:

The ingredients:
Thit Kho

Saute the garlic and shallots: Thit Kho

Add the pork belly:
Thit Kho 

Add seasoning:
Thit Kho 

Add the hardboiled eggs and coconut water:
Thit Kho 

Cover and braise for 2 hours:
Thit Kho

Add to a bowl for rice and enjoy!
Thit Kho

Ingredients:
2 lbs. pork belly
2 shallots
4 garlic cloves
4c coconut water
3 tbsp. fish sauce
1 tbsp. agave nectar
1 tbsp. pepper
1/2 tbsp. salt
4 eggs

Serves 4

Directions:
  1. Hard boil the eggs. (I did 6 instead of 4 because we love eggs!)
  2. Thinly slice shallots and garlic.
  3. Slice pork belly into 1"x2" pieces.
  4. Mix together fish sauce, agave nectar, pepper, and salt.
  5. Saute shallots and garlic in dutch oven.
  6. Add pork belly and sear meat.
  7. Stir in seasoning and saute for a minute or two.
  8. Add coconut water and eggs.
  9. Cover and braise for 2 hours stirring occassionally. 
  10. Eat with rice and veggies.

Wednesday, April 17, 2013

NAILS: Electric Pink

I did my nails!! My sister in law picked the color out for me. At first I thought it made my nails look too fake but it has definitely grown on me!

Essie Mod Square

Most of the time when I do my nails, the color chips or comes off right away because I'm pretty rough with my hands. This picture is day 2 so not too bad! The nail polish is Mod Square by Essie. It's very PINK... very Barbie! Hehe... and I like! I don't usually do full color with bright colors and instead a colored French tip. I will probably do more full colored nails in the future.

Essie Mod Square

Friday, April 12, 2013

FAIL: Burda Blouse

Most things I've made have mistakes all over them... imperfect stitching, un-matching thread color, etc. It's not that I don't like to have things perfect, but I would never wear anything if it had to be perfect.  And then I have the "Too many things gone wrong and I just don't like it!"  Here this particular specimen:

Poly Navy Burda 08-2009-117

From afar, it seems really innocent.  I know I could just go back and remedy all the minor things, but I'm just not feeling it for some reason.  One of these days, I'll go back and make this pattern again, but for this particular top... a wadder.

Pattern: Burda 08-2009-117
Fabric:  Navy poly chiffon from a fabric swap so it was free!

There is nothing particularly wrong with this pattern (other than the difficult to decipher Burda instructions, but that's with all their magazine patterns).  Actually, I love this pattern and this particular issue is one of my favorites!  So what's the problem?  Well when I list them out, they're all really minor...
  • I wasn't paying attention (I had pretty much already given up on this top anyway...) and I attached the facing incorrectly in the front.  There's supposed to be a keyhole in the front, but stitched it all the way up.  My head barely fits through the neckline.
  • This was the first time I've tried a rolled hem on my serger.  I did practice and it's not too bad but it doesn't help how I feel about this top.
  • There's a "tape stain" on the front.
  • The facing keeps flipping out even though it's understitched.

Monday, April 8, 2013

MADE: Peacock Taffy Blouse

A tale of fabric and pattern...

I fell in love with this fabric as soon as I saw it in the "silky" aisle of Joann. I originally bought it with the intent to make another Scout, but as I looked at the fabric it just called for something with a little bit more girly-ness to it and it sat on the shelf with the rest of the prewashed fabric waiting for the perfect match.  The peacock print is actually on the bias so, when I cut the pattern pieces on the bias it made the pattern vertical.

Poly Peacock Chiffon

For Christmas I knew I wanted to get 2 sewing books... I was gifted with Gertie's and Colette's book. As I was glancing through the Colette book I noticed a particular simply blouse with just the perfect amount of frill. I knew this would be the perfect pattern for the long awaiting peacock chiffon.

Colette Taffy

Pattern: Taffy Blouse from The Colette Sewing Handbook
Fabric: Poly Chiffon with Peacock Print from Joann
Cost:  $18.58 = $3 (book $15/5 patterns) + $15.58 (fabric 2 yds @$7.79)
What I Love:  The fabulous fabric and only needing 3 pattern pieces!
Notes:
  • Stabilize/starch fabric MORE! 
  • Left off the ties because didn't see a need for them.
  • Chiffon hem for the sleeve instead of bias tape.

This was the first time I worked with fabric on the bias, and it was a beast to work with!  When using shifty fabric on the bias, be sure to use full pattern pieces.  I read several comments about this on the blogosphere, but didn't heed their warnings... BAD IDEA!  I couldn't get the fabric cut correctly on the fold or get the markings accurate, but it was close enough.  :)

peacock taffy 03

I was also super lazy and didn't switch out my thread when attaching the black bias tape on the neckline.  I have some trouble stitching in the ditch, too, and the lavender stitching definitely stuck out. (For some reason, the stitching on the this part was particularly wavy... not sure why.) I almost redid it, but someone at my local meetup suggested using black fabric marker to color in the thread.  What a genius idea!  Here's the below and after:

peacock taffy 01
peacock taffy 02
The black ink did fade a little after the wash, but it's definitely better than without it...

I do like the top, but in general I don't think I like clothing on the bias.  It's hard to describe... it just feels shifty like it's always moving around on you.  Haha... that just sounds weird, but it just feels funny when I wear it.  I will wear the top and will hopefully have some coordinating bottoms to wear with it soon.

peacock taffy 04