Tuesday, March 12, 2013

MADE: Cassette Tape Flannel Men's Shirt

The beginnings of a shirt for Mr. So...

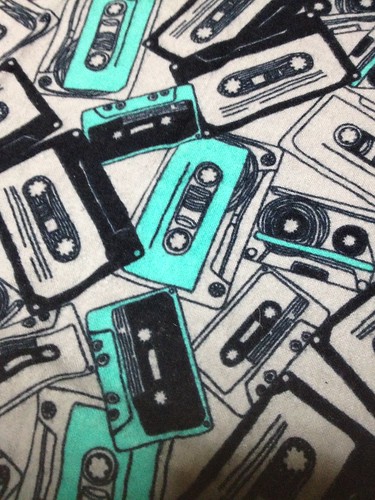
After making a scoodie for my husband with lining in a flannel covered with cassette tapes, I jokingly asked if he'd wear a button-up shirt with the same print. Surprisingly, he said yes. So off I went back to Joann to find this flannel... to my dismay it was no longer available. However, the nearest Joann is only 1 mile away so I stop there frequently just to browse and get other needed items. One day, I was walking through the aisles, and what do I find... the exact print again! It was no longer on sale for $2.79/yd at which I bought it for the scoodie; however, I still had a coupon was able to get it for $3.50/yd and so it began...

Cassette Tape Flannel

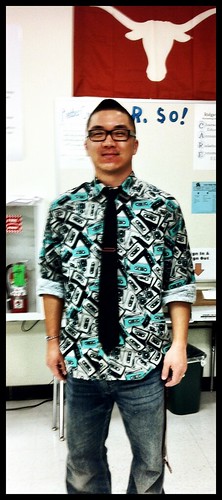
This particular version is his wearable muslin. He actually wore it to work the day after I finished sewing on the buttons for "Dress Like a Celebrity Day" (he's a teacher)... he was dressing like Russell Westbrook who apparently wears some crazy shirts and thick lens-less glasses.  (We are OKC Thunder fans and went to Texas hence the Longhorn in the picture!) Haha... it still had yellow pencil markings for the buttonholes and buttons but I'm sure no one will even notice with the loud print. What do you think... did he dress like Russell Westbrook?

Cassette Tape Flannel

On to the project details:

Pattern:  Kwik Sew 2777 (no longer on the website)
Size:  Medium (default 15 1/2" collar)
Fabric: 100% Cassette Tape cotton flannel from Joann
Cost:  $11.79 (pattern) + $10.50 (fabric 3 yd @ $3.50/yd)
What I Love:  That the pattern has a collar stand and the fabric is so much fun!
Notes:
  • Decreased sleeve length by 2"
  • All raw seams are enclosed except for sleeves and side seams
  • Sew carefully and make sure collar stand and cuffs incase all seams... my collar stand is a little off... which I need to go back and fix.
Future versions
  • Adjust collar size to be 16"
  • Flat fell side seams and sleeves (need to make seam allowance 5/8" instead of 1/4")
  • Research placket insertion techniques
  • If making a slim fit version, will need to add darts or some sort of shaping
  • Label the under collar so it doesn't get attached upside down
  • Try convertible cuffs
  • Reference Shirtmaking by David Page Coffin
Overall:
Instructions are pretty easy to follow along... just need to pay attention on the yoke attachment because the first few times I read it I was like "Wha???". Also, I noticed that the collar corners were flipping up and didn't know why. Miss Lulu, who is also mentioned on Susan's blog, noticed amongst the busy print that my undercollar was stitch as the top so note to self to label the under collar! This will be my go-to button-up (button-down?) shirt pattern for him.  I have fabric that has been in my stash that was bought with the intention of making him shirts, and I'm finally getting around to it.  Making these types of shirts take time and precision sewing so not sure when I'll get around to the next one. :P  Sorry, hon!
Sunday, March 10, 2013

MADE: Candice House Slippers

Pattern:  Candice Slippers by iThinkSew
Fabric:  blizzard fleece leftovers for exterior and cotton flannel leftovers for interior; both from Joann
Size:  8
Cost:  $3.90 (pattern on sale) + $0.00 (scraps of fabric)
What I Love: Simple, easy pattern that does not require much fabric
Notes:
  • Made without adding seam allowances so sizing was not correct. Read the pattern and instructions because it clearly says it needs to be added... I just didn't read. 
  • Interfaced the lining, but not on the exterior and instead added another layer of fleece. It could use more stiffness and maybe more cushion as well.
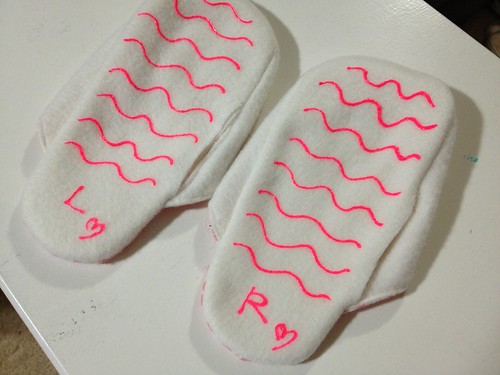
  • Used fabric paint on the bottom for anti-skid properties as well as marking right and left.
I have small feet (usually wear 6.5) and these barely fit me lengthwise... I need to be careful and read the pattern and instructions before proceeding.  I was just WAY TOO overconfident and this is where it got me. :(  Many people request for slippers when they come over to our house, and I'm not sure why... Could it be because we keep it at 62 in the winter?  Hehe... well there will be more of these in the future and hopefully they will be the correct sizes.

Tops:
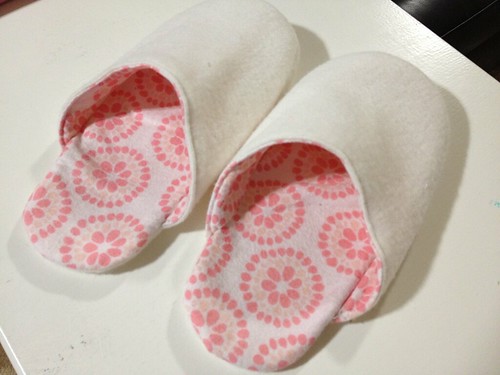
Candice House Slippers

Bottoms:
Candice House Slippers
Please ignore the unfinished areas... :)

MADE: Scoodies Galore

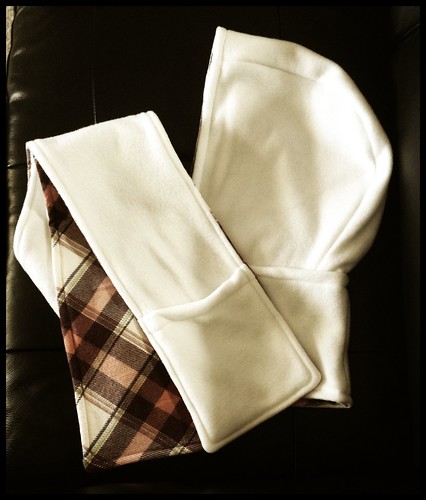
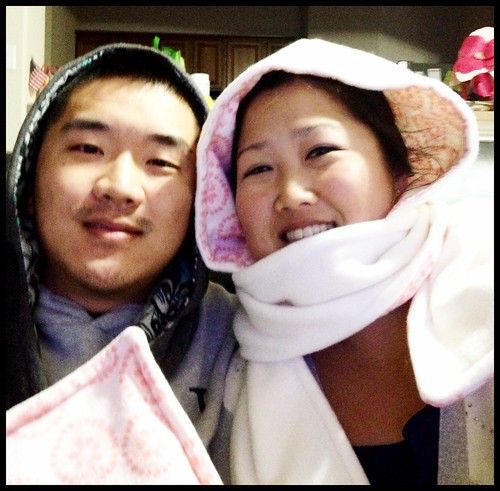
Long ago one of my brothers asked me if I could knit him a scarf, and then some time later he requested that this scarf have a hood.  I want to say this happened many many years ago. Well finally for this past Christmas, I made him this scarf with a hood known as a scoodie, except it wasn't knitted... I didn't get to take a picture of his particular scoodie, but here's one of out of the 6 that were made.

Scoodies!

Pattern: Scoodie (free pattern found here)
Fabric: Exterior - blizzard fleece (1.25 yds) from Joann; Interior - cotton flannel (1.5 yds) from Joann
Costs: $0.00 (free pattern) + ~$9.80(fleece $4.49/yd and flannel $2.79/yd or $3.99/yd)
What I Love: Super easy to make with 4 pattern pieces
Notes:
  • The middle piece of the hood did not match up with the sides of the hood at the notches. I just cut the middle and added 3/4". 
  • Added pockets to the ends of the scarf, which are just 8"x 10" rectangles in fleece. About an 1.25" of the top was folded over and then topstitched prior to attaching the the scarf.
  • Used 1/2" seam allowances instead of 5/8" for no particular reason except that I had blue painters tape marked for 1/2".
Overall:  This was a fun gift giving pattern.  I made these for our siblings plus one for myself and husband for a total of 6!  The long straight stitching on the scarf portion was a little boring especially after doing them so many times, but other than that it's easy peasy and the recipients loved them!  I may even make 2 more for friends that saw ours and loved them, too.

Mr. So and I are sporting ours inside our house... I think we may have worn them a total of 2 times since they were finished... maybe we need to go to Chicago to get more wear out of them. :)  There's also not a good way to wear the scarf.  If you try to wrap both of them around the neck the pockets are super close to your face.  I ended up just throwing one end to the back and keeping one end in the front. RTW scoodies have a detachable hood that can be placed at different intervals to help with this, but I didn't want to do the extra work.

Scoodies!

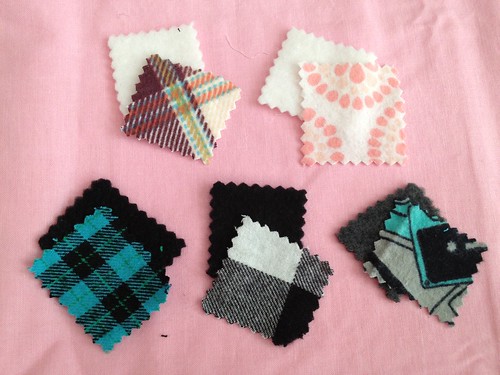
Coming up with the different fleece and flannel combinations for the different scoodies was pretty fun.  There are only 5 swatch combinations because one of them (black and white plaid flannel) was made twice. :)

Scoodie Swatches

In the end, my brother didn't even remember requesting this scarf, but nonetheless he was the inspiration behind making these!  :)